Matchday // Match 12 v AFC Poole Mark II - Season 8 // Cillit Bang FC

Sunday, 9th December 2012
v AFC Poole Mark II
7.15pm
The Matchday Centre

Match details including result, goalscorers, shots, appearances and a minute by minute videprinter.

Result

Lost // 2-8

1st Half Score 0-4

2nd Half Score 2-4

Goals

  • 1 - 14 Kermit
  • 2 - 14 Kermit
  • Right
  • Right

Assists

  • 1 - 5 Gonzo
  • 2 - 5 Gonzo

Shots

  • CBFC
  • 12
  • 3
  • 25%
  • 2
  •  
  • Shots
  • on Target
  • %
  • Blocked
  • AFC Poole Mark II
  • 25
  • 9
  • 36%
  • 1

Match Videprinter

04 min 59 sec | 0-1 | Goal AFC Poole Mark II

05 min 25 sec | 0-2 | Goal AFC Poole Mark II

06 min 21 sec | 0-3 | Goal AFC Poole Mark II - (Own Goal Nick H)

09 min 05 sec | 0-4 | Goal AFC Poole Mark II

15 min 00 sec | 0-4 | Half Time

17 min 40 sec | 0-5 | Goal AFC Poole Mark II

19 min 03 sec | 0-6 | Goal AFC Poole Mark II

21 min 18 sec | 0-7 | Goal AFC Poole Mark II

24 min 19 sec | 1-7 | Cillit Bang FC Goal Icon Goal 14 Kermit // Assist 5 Gonzo

25 min 02 sec | 2-7 | Cillit Bang FC Goal Icon Goal 14 Kermit // Assist 5 Gonzo

28 min 32 sec | 2-8 | Goal AFC Poole Mark II

30 min 00 sec | 2-8 | Full Time

Appearances

  • Cillit Bang FC Goalkeeper Icon
  • 1 -
  • Cillit Bang FC Blue Kit Player Icon
  • 4 -
  • 5 -
  • 14 -
  •  
  • Fozzie
  •  
  • Beaker
  • Gonzo
  • Kermit
  • Nick H

Starts

  • Cillit Bang FC Goalkeeper Icon
  • 1 -
  • Cillit Bang FC Blue Kit Player Icon
  • 4 -
  • 5 -
  • 14 -
  •  
  • Fozzie
  •  
  • Beaker
  • Gonzo
  • Kermit
  • Nick H

Detailed Synopsis of the match with team news with a few screenshots from the game.

Man Down and Punished

Team News: Lack of numbers and injuries put CBFC at disadvantage with only 5 available players. One player short.

Previous Results: Played 7 Won 4 Lost 3 - AFC Poole ended the hoodoo in this fixture with a win in the recent cup game.
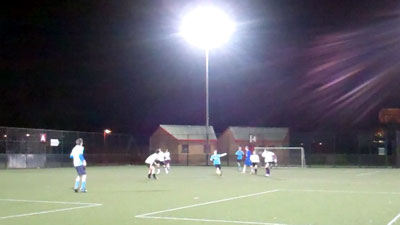
First Half

Goal 0-1 // AFC Poole Mark II

With two in attack in a move that ends with a shot out wide the goalkick comes down field in response. Despite getting back behind the ball a simple through ball is passed through to the unmarked striker who pokes towards goal the ball in off the post.

Goal 0-2 // AFC Poole Mark II

Gonzo takes a little too much time in possession of the ball after kick off, his pass intercepted, the scorer is first to the ball placing the shot inside the post. Gifting the opposition a second goal lead six seconds after kick off.

Goal 0-3 // AFC Poole Mark II - Own Goal Nick H

The misery continues with the passing options limited Poole break on the counter passing the ball side to side outside the box, the shot heading wide unbeknownst to Nick as he mistakenly diverts the ball goalwards.

Goal 0-4 // AFC Poole Mark II

Limiting fancy possession play back and forwards and playing attack as much as possible Poole kept feeding the ball into the danger area seeking to expose the one man advantage. After a pass into the box is cut out winning the ball back and the pass to the original recipient gives the side a chance at goal which is taken.

AFC Poole had a few further shots to really stick the knife in before half time whereas CBFC had a miserable half, really struggling with the disadvantage. Beaker had a powerful shot across goal that glanced wide of the far post after a great move put him through on the right wing.
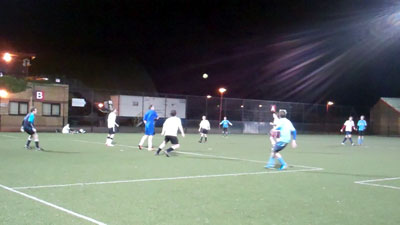
Second Half

Goal 0-5 // AFC Poole Mark II

Self-inflicted after a simple goalkick with too much power goes out for a kick in. With the last man deciding to shoot from distance Gonzo's block cannot halt the speed or stop the ball heading goalwards, Fozzie moving late after the surprise shot, cannot get down quick enough to defend the bottom corner.

Goal 0-6 // AFC Poole Mark II

A quality goal, ball over the defence to the lone player, chesting the ball and looping the ball over Fozzie. Even with a man down the marking was dreadful with the CBFC players clearly not wanting to be there on the night.

CBFC get their own chance to score a quality goal with Beaker playing the ball towards Gonzo on the edge of the goal area. The pass perfect, the flick onto goal having been directed too much as the ball bounces wide.

Goal 0-7 // AFC Poole Mark II

Quality goal taking advantage of bad defending, ball forward, laid to the side for a first time volley.

Goal 1-7 // 14 Kermit - Assist 5 Gonzo

Despite being seven goals to the good with a clean sheet to defend for another few minutes against a very downbeat opposition the defender makes a mix-up. After he dribbles the ball forward his pass is intercepted leaving himself unable to get back after his venture forward. Kermit gets a sniff of a chance and takes it smashing the ball to the far post.

Goal 2-7 // 14 Kermit - Assist 5 Gonzo

After Beaker's massive crossfield pass is headed clear Gonzo tackles the player in the centre of the pitch flicking the ball to Kermit. With the keeper rooted to his line upon the turn of Kermit the second goal is a dead cert.

Surprisingly the game had turned on its head and that's including the inequality of the side's numbers. Kermit went close to scoring a hat-trick after hooking the ball goalwards with his back to goal on the volley, Nick's cross from the kick in excellent, the downside the post got in the way. Taking a knock on impacting the ground Kermit had another chance moments later. Gonzo tried his best with three assists in three consecutive passes, sending a free kick towards the far right corner of the opposition area Kermit headed wide.

Goal 2-8 // AFC Poole Mark II

After trying to get a member of their team to score, Fozzie makes the save to deny the player a goal. In at the back post and free is one of his teammates to score a tap in.

Full-Time Result: Cillit Bang FC 2-8 AFC Poole Mark II
Cillit Bang FC v AFC Poole Mark II - Football 6-a-side Bournemouth
Gonzo flicked the ball forward setting up Kermit's 125th goal.
Cillit Bang FC v AFC Poole Mark II - Football 6-a-side Bournemouth
Kermit almost gave Gonzo three consecutive assists.

Individual Match Statistics for all players with an appearance in the match.

1 Fozzie GK
  • Played
  • Starts
  • Whole Match
  • Time Played (min)
  • 1
  • 1
  • 1
  • 30
  • Saves
  • Saves (Crosses)
  • 2
  • 4
  • Short Passes
  • S Pass Complete
  • S Pass %
  • 10
  • 8
  • 80%
  • Long Passes
  • L Pass Complete
  • L Pass %
  • 15
  • 6
  • 40%
  • Clean Sheet
  • Assist
  • Own Goal
  • Penalty Save
  • 0
  • 0
  • 0
  • 0
  • Tackles
  • Tackles Won
  • Balls Won
  • Clearance
  • 0
  • 0
  • 6
  • 1
  • Possession Lost
  • Corner Lost
  • Kick In Won
  • Kick In Lost
  • 0
  • 1
  • 0
  • 4
  • Fouls Won
  • Fouls Lost
  • Free Kick Won
  • Free Kick Lost
  • 0
  • 0
  • 0
  • 0
4 Beaker
  • Played
  • Starts
  • Whole Match
  • Time Played (min)
  • 1
  • 1
  • 1
  • 30
  • Goals
  • Assists
  • Shots
  • Shots on Target
  • 0
  • 0
  • 2
  • 0
  • Passes
  • Passes Complete
  • Pass %
  • Possession Lost
  • 26
  • 19
  • 73%
  • 7
  • Tackles
  • Tackles Won
  • Balls Won
  • Clearances
  • 8
  • 6
  • 11
  • 3
  • Blocked Shots
  • Blocked Crosses
  • Fouls Won
  • Fouls Lost
  • 0
  • 1
  • 0
  • 0
  • Free Kicks Won
  • Free Kicks Lost
  • Free Kicks Taken
  • Free Kick Success
  • 0
  • 0
  • 0
  • 0
  • Kick Ins Won
  • Kick Ins Lost
  • Kick Ins Taken
  • Kick Ins Success
  • 1
  • 7
  • 3
  • 2
  • Corners Won
  • Corners Lost
  • Corners Taken
  • Corners Success
  • 0
  • 1
  • 0
  • 0
5 Gonzo
  • Played
  • Starts
  • Whole Match
  • Time Played (min)
  • 1
  • 1
  • 1
  • 30
  • Goals
  • Assists
  • Shots
  • Shots on Target
  • 0
  • 2
  • 1
  • 0
  • Passes
  • Passes Complete
  • Pass %
  • Possession Lost
  • 26
  • 18
  • 69%
  • 2
  • Tackles
  • Tackles Won
  • Balls Won
  • Clearances
  • 7
  • 6
  • 6
  • 0
  • Blocked Shots
  • Blocked Crosses
  • Fouls Won
  • Fouls Lost
  • 1
  • 2
  • 0
  • 0
  • Free Kicks Won
  • Free Kicks Lost
  • Free Kicks Taken
  • Free Kick Success
  • 1
  • 0
  • 1
  • 1
  • Kick Ins Won
  • Kick Ins Lost
  • Kick Ins Taken
  • Kick Ins Success
  • 0
  • 0
  • 1
  • 1
  • Corners Won
  • Corners Lost
  • Corners Taken
  • Corners Success
  • 0
  • 2
  • 0
  • 0
14 Kermit
  • Played
  • Starts
  • Whole Match
  • Time Played (min)
  • 1
  • 1
  • 1
  • 30
  • Goals
  • Assists
  • Shots
  • Shots on Target
  • 2
  • 0
  • 7
  • 3
  • Passes
  • Passes Complete
  • Pass %
  • Possession Lost
  • 28
  • 20
  • 71%
  • 4
  • Tackles
  • Tackles Won
  • Balls Won
  • Clearances
  • 2
  • 2
  • 12
  • 0
  • Blocked Shots
  • Blocked Crosses
  • Fouls Won
  • Fouls Lost
  • 0
  • 2
  • 0
  • 0
  • Free Kicks Won
  • Free Kicks Lost
  • Free Kicks Taken
  • Free Kick Success
  • 0
  • 0
  • 0
  • 0
  • Kick Ins Won
  • Kick Ins Lost
  • Kick Ins Taken
  • Kick Ins Success
  • 3
  • 0
  • 1
  • 0
  • Corners Won
  • Corners Lost
  • Corners Taken
  • Corners Success
  • 0
  • 0
  • 0
  • 0
- Nick H
  • Played
  • Starts
  • Whole Match
  • Time Played (min)
  • 1
  • 1
  • 1
  • 30
  • Goals
  • Assists
  • Shots
  • Shots on Target
  • 0
  • 0
  • 2
  • 0
  • Passes
  • Passes Complete
  • Pass %
  • Possession Lost
  • 29
  • 23
  • 79%
  • 5
  • Tackles
  • Tackles Won
  • Balls Won
  • Clearances
  • 7
  • 3
  • 16
  • 1
  • Blocked Shots
  • Blocked Crosses
  • Fouls Won
  • Fouls Lost
  • 0
  • 2
  • 0
  • 0
  • Free Kicks Won
  • Free Kicks Lost
  • Free Kicks Taken
  • Free Kick Success
  • 0
  • 0
  • 0
  • 0
  • Kick Ins Won
  • Kick Ins Lost
  • Kick Ins Taken
  • Kick Ins Success
  • 3
  • 3
  • 3
  • 2
  • Corners Won
  • Corners Lost
  • Corners Taken
  • Corners Success
  • 0
  • 0
  • 0
  • 0

Here are both halves for the 30 minute match (15 minutes each half). Be sure to view them in High Definition.